Good imagery can make or break a business. Think that’s extreme? According to Crowdriff, 63% of consumers say that images are more important than product descriptions. That means that how good your product looks is more important than how good it sounds.
Cratejoy’s Marketplace is certainly no exception to this guideline. The better your products appear in pictures, the more likely you are to make a sale. With that said, we understand that good photography can be intimidating for entrepreneurs on a budget. But it doesn’t have to be – natural, even lighting and a smartphone can do wonders. (Pro tip: Use Portrait Mode, on the iPhone 10 if you can.)
To help you achieve high-quality imagery at a low cost, we’ve put together an easy guide of photography Do’s and Don’ts, as well as Cratejoy-approved photo types that will increase your listing’s conversion rate and help you acquire more subscribers.
Marketplace Photography Do’s
- Landscape layout (3:2 aspect ratio)
- Bright, natural lighting that’s even across the photo
- Complimentary backdrop or background
- High resolution (300ppi)
- 1200×800 pixel dimension
- Photos that depict your actual products and packaging
Marketplace Photography Don’ts
- Blurry, low-resolution, or dim/dark photos
- Stock images or photos not owned by you (e.g. photos from your vendors)
- Digitally-created pictures (e.g. centering your logo, collages, heavy text overlay)
- Digitally-modified photos (e.g. borders or heavy filters)
- Social handles or URLs on pictures
- Outdated pictures (i.e. a Christmas-themed box in February)
Read more: Take a look at the Marketplace guidelines for images.
Types of Subscription Box Photos
We’ve identified 5 of the most successful image types on Cratejoy’s marketplace. From the flat lay to the lifestyle shot, a mix of these tried-and-true photo types will take your marketplace listing to the next level.
1. The Flat Lay
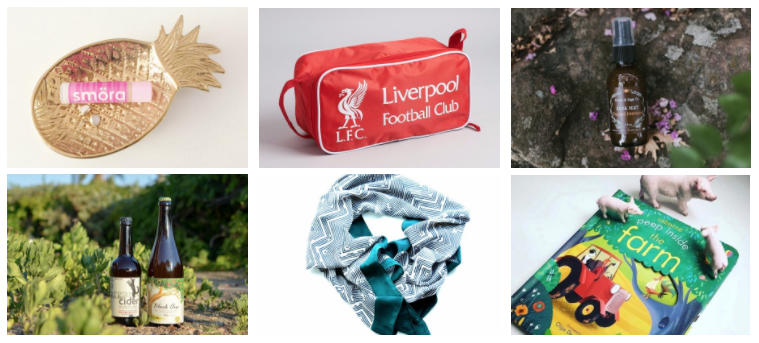
 Pick a simple background and lay out all the products from a month’s box. Hover over the products by standing on a chair, and get an overhead shot of everything while avoiding shadows. The key here is to pick a simple background. We like a light-colored table or floor, light-colored paper, or natural surfaces for a more rugged look (wood, concrete, or grass).
Here’s another example of a strong flat lay from World Food Spice Box:

Pro tip: Take an extra flat lay shot with an empty space in the middle of your products. Later, you can add in your logo or box name digitally.
2. The Product Highlight
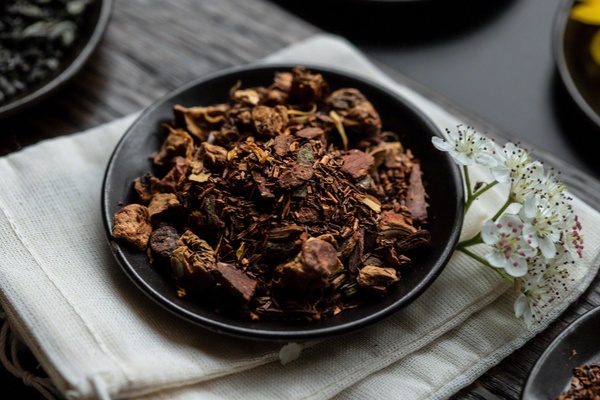
 Do you have a standout item in a given month’s box? Take a separate picture spotlighting the item. The best product highlight pictures contextualize the item, so it’s not just the product floating on a blank white background. Consider having other items in the background like your branded box, or the rest of the products in the box.
Pro tip: Think about this like a mini-unboxing or demonstration of your signature product. If it’s a skincare product that comes packaged in a box, take it out of the box. If it’s a candle, take a photo of it lit up! If it’s something you assemble, show it built.
Here’s an example of a well-composed product highlight from Simple Loose Leaf Tea, featuring a specific tea variety:
3. The Branded Box
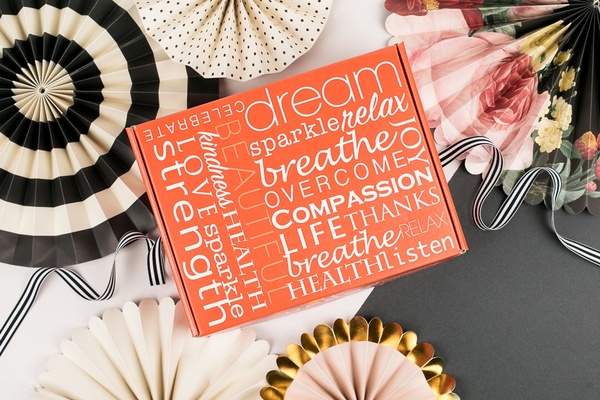
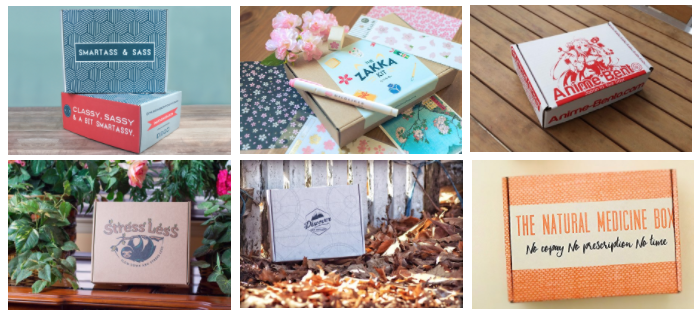 Pick a background that contrasts or complements the box – a light-colored background for brown or brightly-colored boxes, or a vibrant background if your box is white. The branded box picture looks best if you use custom-printed boxes or stamps to customize your packaging. If you use branded stickers, however, we recommend the “unboxing experience” image type instead; we’ll explain why in a minute.
Pro tip: We recommend only uploading one branded box picture to your Marketplace listing. We find that consumers are more excited by the other photos, especially lifestyle photos (type #5).
Here’s another example of a branded box photo by UPBOX, whose box design reflected their brand values:
4. The Unboxing Experience
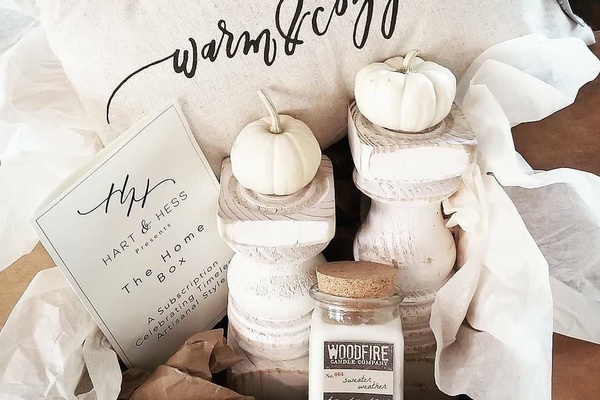
 Everyone’s favorite picture of a subscription box bursting with goodies! Be warned – this photo can take a lot of setup to look good, so you want to do everything you can to keep it from looking messy. We recommend removing visible packaging supplies and crinkle paper. If it’s hard to arrange your items so they “burst” just so out of the box, try the flat lay instead!
Pro tip: Try zooming out a bit and positioning the box on a diagonal. It’ll help show off the contents better.
Here’s another example of an unboxing photo from decor subscription Hart & Hess:
5. The Lifestyle Picture (Difficulty Level: High)
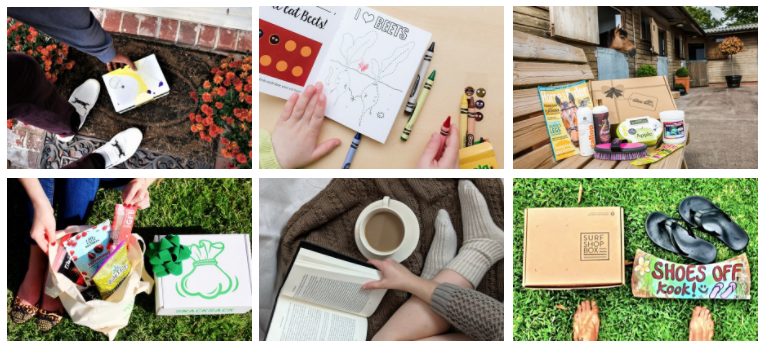 The goal here is to show off how your products will fit into someone’s life. Get a little aspirational with it! Some lifestyle pictures show customers interacting with your box, like a picture of kids and parents playing with a toy-themed box, or pets next to a pet-themed box. Others will show the products in context, like a beauty products box on a bathroom sink, or a cooking-themed box arrayed on a cutting board next to groceries.
Pro tip: Struggling to take a full-body picture or group shot of customers interacting with your box? Try scaling it down. Many great lifestyle pics have the customer mostly out-of-shot – it might be a close-up of someone’s hands holding or interacting with a product.
Here’s a final example of a lifestyle product photo, from Coloring and Classics:

Want more guidance?
Take a look at our tips and tricks to designing great images in our guide to increasing your Marketplace listing’s conversion rate!