Today we’re talking about how to build a box before you, well… build your first month’s box. Maybe this sounds out there, but stick with us: prototype boxes can be a game changer for new subscription box businesses.
The idea behind a prototype box is that you have a set of products to draw in subscribers before your launch. The uses of prototype boxes are myriad: they help show prospective customers what your box is all about, demonstrate to potential vendors that your box is a good business decision for them, and establish your brand online.
Below, we’ll go into the process of building a prototype box for prelaunch, as well as different options you can choose along the way.
Step 1: Sourcing Products

The only rule for your prototype box is that the box’s contents reflect accurately the value and niche your subscription will fulfill. If that means it’s easier for you to fill your prototype with the same items you plan on using for the first month, don’t hesitate.
However, you may not be at the point in your business yet to have sourced future boxes. Perhaps you’re finalizing the image of your target customer, or still narrowing in on vendors that suit your budget. In these cases, it’s best to build a prototype separate from your intentions for the first month after launch.
Think about your value proposition. What do you want subscribers to take away from your service? Whatever your value proposition, it should be reflected in your prototype. Make sure that the quantity, quality level, and monetary value of the products you choose for the prototype matches what will come standard in your subscription.
For example, if you intend to include 6-8 luxury beauty and skincare items worth $150 each month, your prototype must also offer 6-8 luxury beauty and skincare brands worth $150 — even if they are not the same brands you’ll include after launch. You want to evoke the experience of your future customer as accurately as you can.
Step 2: Deciding Your Aesthetic
After you decide what to put into your prototype, you’ll need to decide what the physical box looks like. What packing material do you want to use? Do you want to save money and use a sample box, or pay a little more to establish branding right away?
Tip: Read our breakdown of how to brand your packaging without breaking the bank
Both box types have advantages. Plenty of Cratejoy merchants have chosen sample packaging for their prototype boxes and funneled what they saved into other aspects of the prelaunch process.

Follow STEM Reads’ lead: See how you can order Cratejoy-branded boxes from BoxUp for a low cost if you’re not ready to design your box yet! Or, order one custom printed box as proof from BoxUp for FREE to confirm if your design is a good fit. If it is, you can use it for prelaunch photos!
On the other hand, putting more time and cost into the box design upfront can really wow a prospective subscriber, vendor, or influencer when they try out your prototype. It shows you’re committed to creating an exciting, well-designed unboxing experience.
Fortunately, Cratejoy’s partnership with BoxUp offers both sample and custom-designed packaging at a 15% first-time discount for Cratejoy merchants. Sellers through Cratejoy also receive 5% off for life!
Regarding packing material, we recommend shredded kraft (“crinkle”) paper for prototype boxes. Kraft paper helps the box look more full in photos, doesn’t obscure products, appears hand-cut – so it can make a subscriber think “handmade” – and, overall, feels more Instagram-worthy than traditional alternatives like bubble wrap. That being said, if you include fragile or potentially breakable items in your prototype box, it’s safer to wrap those products in an additional layer of protection, like tissue paper or small padded envelopes.
Step 3: Marketing the Prototype

Once you have the aesthetics and contents of your prototype squared away, it’s time to photograph it. (After all, if no one can see your prototype, does it really exist?)
There are four main photograph styles you’ll want to master for your prototype photoshoot.
Flat Lays and Product Highlights
The flat lay and product highlight work well to show off specific detail from your prototype box and are easier to tackle if you’re new to photography. Furthermore, because you’re setting each product out separately, the flat lay can help make your prototype products look plentiful and carefully curated. (The STEM Reads Book Club example above uses a flat lay for their prototype images.)
Unboxing Photos
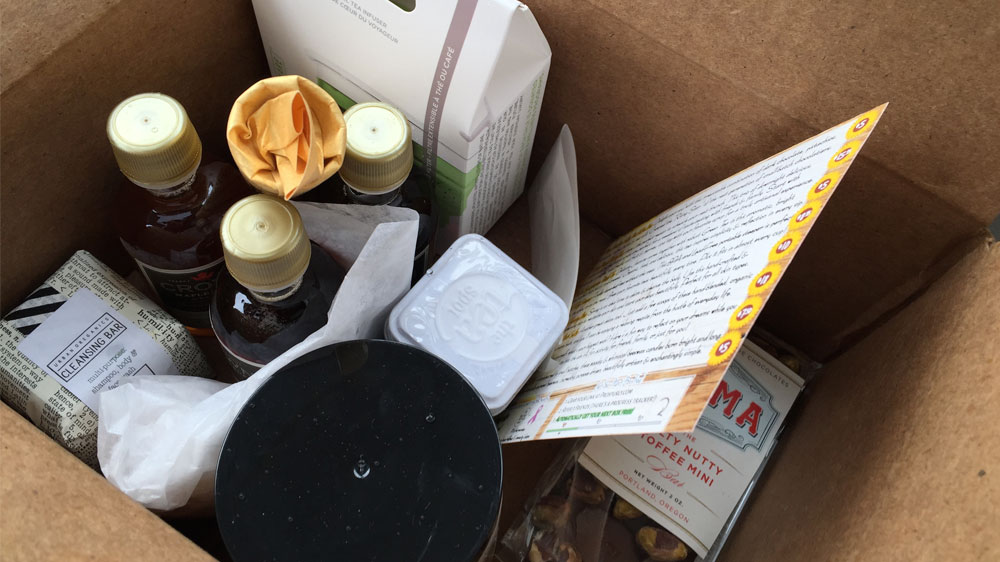
A photo that mimics the unboxing experience can be an amazing opportunity for prospective subscribers to see the value of your box. However, it can be challenging for amateur photographers, so don’t worry if it takes time to get just right. You’ll want the products to look like they are “bursting” out of the box, in order to showcase each item and make the box look stuffed with goodies. Shifting the box’s position to be on a diagonal, so you don’t take a photo straight-on, can help minimize the box’s visual size while maximizing the space your products take up.
Lifestyle Photos
The last option is to evoke how customers might interact with your products. This is the most difficult type of image to nail down, so for a prototype, flat lays and unboxing photos may be the way to go. But if you’re looking for a challenge, ask a friend or family member to hold a highlighted product or take products out of your prototype box. Make sure the lighting is natural — an hour or so before sunset is best — and try it from a number of angles to practice.
Need more tips? Check out Cratejoy’s full guide to mastering product photography for your Marketplace listing.
Step 4: Establishing Your Brand

A prototype box is of no use to you if it doesn’t help promote your subscription. Once you finalize your prototype photography, it’s time to build upon your brand for vendors and online communities. The first step is to publish your product photos on your social media accounts and online storefront. After that, you’ll want to work on developing a media kit to send out to potential brand partners, like vendors, influencers, and commercial press outlets.
The key piece of your media kit is called a one-sheet: a summary of your brand’s value proposition, projected customer demographics, and detailed specs (like pricing and what benefits vendors can expect from supplying product). Including images of your prototype box is a great way to help potential brand partners visualize your box and its worth. This allows you to demonstrate visually and verbally the value in partnering with you – and the value subscribers will receive from their support.
In short, a prototype box gives you a chance to show potential partners that you have something to show. You’re putting your money where your mouth is.
See an example: Read Lilee’s successful one-sheet for vendors on our blog.
A No-Brainer
Ultimately, there are myriad reasons to build a prototype box for prelaunch. In addition to being an incredible marketing tool, it gives you a practice run for building boxes after you launch. When you’re ready to build your first month’s box, you’ll already know how to source products, design packaging and fulfill orders, photograph and publicize, and promote your brand.
So what are you waiting for?


